
How to remove mold from bathroom spaces starts with understanding why it forms, how it spreads, and what actually keeps it from coming back. Bathroom mold grows fast, and cleaning it once is rarely enough. From moisture buildup to hidden leaks, there are several causes you need to address. Later in this guide, you will also see how using an Air Purifier for Mold powered by ActivePure can make long-term prevention dramatically easier.
Why Bathroom Mold Forms and Returns
Mold grows in bathrooms for one simple reason: the environment is perfect for it. Warm temperatures, moisture, and limited airflow create exactly the conditions mold needs to thrive. Even a very clean bathroom can develop mold because the problem often has nothing to do with dirt. It is mostly caused by humidity and trapped moisture. Understanding these causes is the first step in learning how to remove mold from bathroom areas effectively and prevent it from returning. Here are the most common reasons mold keeps coming back:
- High Humidity Levels: Bathrooms stay humid long after showers or baths. According to the EPA, mold begins to grow when indoor humidity stays above 60 percent, which happens easily in bathrooms without proper ventilation. High humidity is a major factor you must address when figuring out how to remove mold from bathroom surfaces long term.
- Poor Ventilation: Without a strong exhaust fan or an open window, steam has nowhere to go. Moisture collects on walls, ceilings, grout, and even inside light fixtures. These areas become ideal spots for mold to grow.
- Frequent Condensation: Cold tiles, mirrors, and painted surfaces attract condensation. When these surfaces stay damp for long periods, mold spores can settle and multiply.
- Hidden Leaks or Dripping Fixtures: Even tiny leaks behind walls, under sinks, or around shower seals can keep areas constantly wet. These hidden spots often grow mold before the homeowner realizes something is wrong.
- Soap Residue and Body Oils: Residue on tiles or grout can feed mold. The CDC notes that mold does not need much to survive. It only needs moisture and a minimal food source.
- Old or Worn-Out Caulking: Cracked caulk around tubs and sinks absorbs water, which makes it one of the first places mold appears.
Get a Free Air Quality Consultation for Mold in UAE
Why Mold Keeps Returning
If mold reappears after cleaning, the root cause was not fixed. Common reasons include:
- Inadequate drying after showers
- Poor air circulation
- Cleaning the surface but not killing the spores
- Mold growing behind walls or under tiles
- High humidity in the entire home
Addressing these underlying issues is the key to removing mold permanently, not just temporarily. This is why many homeowners who search for how to remove mold from bathroom spaces successfully must first understand what creates the problem in the first place.
How to Know You Have Bathroom Mold?
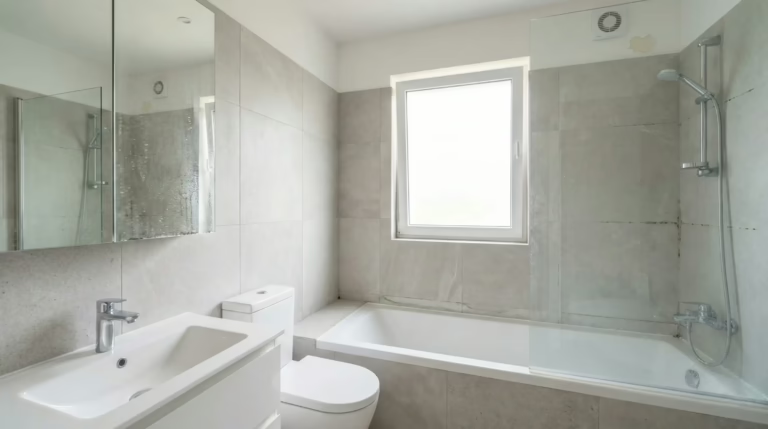
Bathroom mold is not always obvious. Sometimes it shows up as dark patches on grout, and other times it hides behind caulking or produces a musty smell before any discoloration appears. Knowing the early signs helps you catch the problem faster and makes the cleaning process much easier. Here are the most common signs you may be dealing with mold in your bathroom:
- Visible Spots or Discoloration :The CDC notes that mold can appear in many colors, including black, brown, green, or even orange. These spots often show up on grout, tiles, walls, ceilings, or around the shower door.
- A Persistent Musty Smell: A strong musty or earthy smell is often the first warning sign, even before mold becomes visible. This odor usually means mold is growing in hidden places such as behind tiles or under caulking.
- Peeling Paint or Bubbling Wallpaper: Moisture trapped behind bathroom walls can cause paint to peel or wallpaper to lift. The EPA mentions that excess moisture inside walls is a common cause of hidden mold growth.
- Stubborn Stains That Keep Coming Back: If you scrub away stains on grout or silicone and they return quickly, it often means mold spores are still active beneath the surface.
- Increased Allergy Symptoms: The WHO reports that mold exposure can trigger symptoms such as coughing, sneezing, watery eyes, or irritated skin. If your symptoms worsen when you enter the bathroom, mold may be the reason.
- Condensation That Never Fully Dries: Consistently damp mirrors, tiles, or windows are signs of high humidity. Persistent moisture creates exactly the environment mold needs to grow.
Recognizing these signs early will make the rest of the process easier and help you plan how to remove mold effectively. Once you spot one or more of these issues, it is usually time to investigate further and take action before the mold spreads.
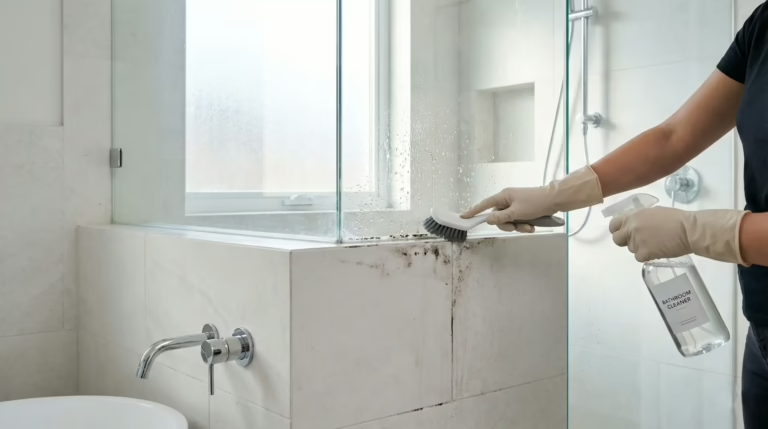
How to Remove Mold from Bathroom Safely and Effectively?
Removing bathroom mold is not just about spraying a cleaner and wiping it away. Mold spores can irritate your skin, eyes, and breathing, so taking a few careful steps before you begin makes the process safer and much more effective. A proper setup also helps ensure you do the job once, rather than dealing with mold again in a few weeks. Before anything else, it is important to make sure you are protected, which starts with choosing the right safety gear.
Safety Gear You Need Before Starting
Before handling mold, make sure you are protected. The CDC recommends chemical-resistant gloves, protective eyewear, and a simple mask such as an N95 to reduce the amount of spores you breathe in. These items are inexpensive but can significantly lower irritation while you clean. Keeping a window open or the exhaust fan running also helps maintain safe airflow.
Tools and Cleaning Supplies to Prepare
- Gathering what you need before you start will save time and make the whole process feel more organized.
- A sturdy scrub brush is one of the most important tools. It gives enough pressure to lift mold from tiles and grout without damaging the surface.
- A microfiber cloth is useful for wiping away loosened residue. It absorbs moisture well and helps you see your progress more clearly as you clean.
- You will also need a spray bottle. It allows you to apply your cleaning solution evenly so it stays in contact with the mold long enough to work properly.
- When it comes to cleaning products, choose either a store-bought mold remover or simple household solutions like white vinegar or hydrogen peroxide. These options are commonly mentioned by the EPA as effective for treating surface mold.
- Keep a bucket of warm water nearby. It makes rinsing easier, especially if you are tackling larger areas.
- Finally, an old toothbrush is great for corners, edges, and narrow grout lines. It lets you reach spots a regular brush cannot, and it is gentle enough for detailed work.
Pre-Cleaning Steps to Protect Your Bathroom
Before you begin scrubbing, remove items like towels, mats, and toiletries from the bathroom to keep them dry and uncontaminated. Covering metal fixtures with a light cloth can protect them from strong cleaners.
It is also a good idea to switch on additional lighting so you can see mold hiding in corners or around seams. These few minutes of preparation often make the cleaning process smoother and help you avoid accidental damage.
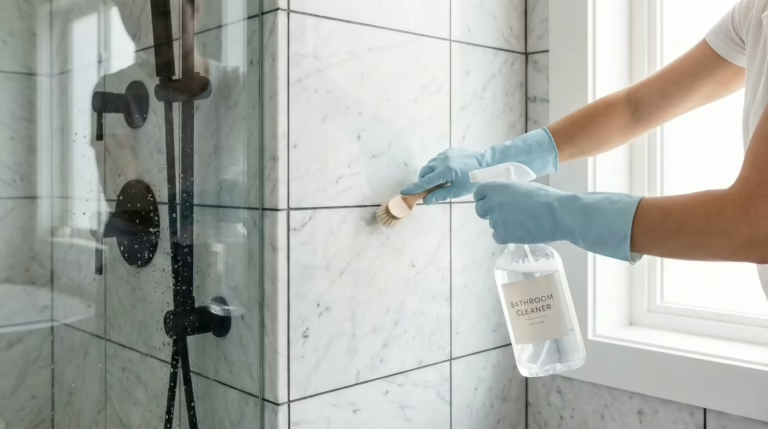
Step-by-Step Bathroom Mold Removal
Once your safety gear is on, your tools are ready, and the area is cleared, you can focus fully on the cleaning itself. The goal here is simple: remove visible mold, disrupt the roots as much as possible, and leave the surface clean and dry so it is harder for mold to grow again. Now that everything is in place, you can follow the steps below to learn exactly how to remove mold from bathroom surfaces in a clear and organized way.
Step 1: Apply the Cleaner Generously
Begin by spraying or spreading your chosen cleaner over the moldy area. Cover the spots fully so there are no dry patches left in between. Try not to rush this part. A light mist is usually not enough, especially on grout and textured tiles.
Step 2: Let the Product Sit and Work
Give the cleaner time to do its job. The EPA explains that mold can grow into porous surfaces, so contact time is important if you want more than a cosmetic result. A few minutes is often the minimum. During this time, avoid scrubbing or touching the area. Let the solution soak in and soften the mold.
Step 3: Scrub in Small Sections
When the cleaner has had time to work, start scrubbing. Work in small sections instead of trying to clean everything at once. This helps you control the pressure and see where the mold is lifting. Use steady, firm movements rather than harsh, fast scrubbing. You want to remove the mold, not damage the tile or grout.
Step 4: Pay Extra Attention to Grout and Edges
Mold often hides in grout lines, corners, and around fixtures. Use a smaller brush, such as a toothbrush, to get into these tight areas. Move the brush along the lines slowly so you do not skip over small spots. If you see mold deep in the grout, apply a bit more cleaner and repeat the scrubbing instead of scraping the surface too hard.
Step 5: Reapply Cleaner if Stains Remain
Some stains will not disappear on the first pass, especially if the mold has been there for a long time. In that case, apply more cleaner and let it sit again. It is better to repeat the process gently than to use too much force and scratch the surface. Persistent marks can sometimes be light staining rather than active mold, so focus on removing anything that looks fuzzy, damp, or freshly discolored.
Step 6: Wipe Away Residue as You Go
As the mold loosens, wipe the area with a cloth to remove both the residue and the used cleaner. This makes it easier to see where you still need to work. Change the cloth or rinse it often so you are not spreading spores from one place to another.
Step 7: Do a Final Pass on Problem Areas
When the main surfaces look clean, scan for small patches you may have missed. Check around taps, the base of the shower, and along silicone lines. If you notice new spots that appeared as you cleaned, treat them immediately. A quick targeted scrub at this stage can prevent the mold from spreading again later.
Rinsing, Drying, and Inspecting the Area
After you finish scrubbing, take a moment to rinse everything well. Use clean water and a fresh cloth so you are removing the loosened mold, not just pushing it around. Rinsing also helps you see the true surface again, which makes it easier to spot any areas that might still need attention.
Once the cleaner is gone, focus on drying the space. This part matters more than most people realize. Mold grows quickly in damp places, so you want to remove as much moisture as you can. Start by wiping the area with a dry towel, then let the bathroom air out. Open a window if you have one or switch on the exhaust fan to help things dry faster.
When everything feels dry, do a slow, careful check of the area you cleaned. Look along grout lines, around corners, and near fixtures where moisture tends to hide. If you notice a small spot you missed, treat it right away while the surface is still clean and easy to work with. Catching these tiny patches now prevents them from spreading and saves you from having to repeat the whole process later.
How to Remove Mold from Bathroom Walls Carefully?
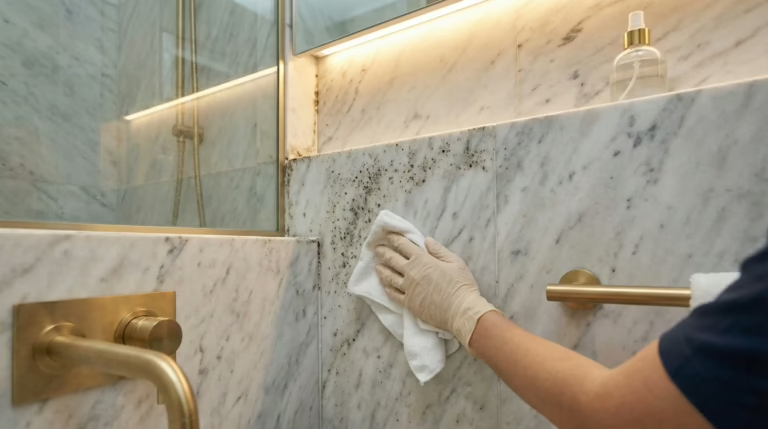
When you want to understand how to remove mold from bathroom walls safely, the most important thing is protecting the paint while still removing the mold fully. Painted surfaces are much more delicate than tile or grout, so the approach needs to be gentle, controlled, and moisture-aware. Here are the key points to keep in mind:
- Use a mild cleaner first: A small amount of dish soap mixed with warm water is usually enough for light mold on painted walls. It is gentle and less likely to affect the finish.
- Vinegar can help with stubborn spots: The CDC notes that white vinegar can reduce surface mold on many materials, including painted walls, as long as it is applied lightly and not left to soak for long.
- Avoid abrasive tools: Soft sponges or microfiber cloths are the safest options. Scrub brushes or rough pads can scratch the paint or cause it to fade.
- Clean in small sections: Work slowly and avoid applying too much moisture at once. Painted walls can absorb water, which may leave streaks or cause new mold to appear later.
- Rinse with a damp cloth: This helps remove any leftover cleaner without soaking the wall.
- Dry the wall completely: Proper drying prevents mold from returning. Open a window, turn on the fan, or use gentle airflow to speed up the process.
- If stains remain, they may not be active mold: Stubborn discoloration often means the paint has been stained. In those cases, repainting with a moisture-resistant bathroom paint is usually the best long-term solution.
How to Remove Mold from Bathroom Ceiling Effectively?

Understanding how to remove mold from bathroom ceiling surfaces starts with knowing why ceilings attract mold so easily. Warm, humid air rises and settles near the top of the room, which means the ceiling often stays damp longer than the walls or tiles. If ventilation is weak, this moisture lingers and creates the perfect place for mold to grow. Cleaning this area takes extra care because you are working overhead and dealing with a surface that cannot handle too much moisture.
Begin by making sure the ceiling is completely dry. If you notice condensation, wait a few minutes and let the exhaust fan run. A dry surface helps you see the mold clearly and prevents streaking during cleaning.
Choose a gentle but effective cleaner. A mixture of warm water and mild detergent works well for lighter spots. For more stubborn areas, diluted vinegar or hydrogen peroxide can help, both commonly referenced in EPA guidance for treating surface mold. Avoid using full-strength bleach on ceilings, since it tends to drip easily and can irritate your skin and eyes.
Use a soft sponge or a cloth attached to an extension handle so you can reach the area comfortably. Apply only a small amount of cleaning solution. Too much liquid can drip down or soak into the ceiling material, which may cause new problems later.
A few extra tips can make the process safer and more manageable:
- Use a stable step stool if you need additional height
- Wear eye protection to protect yourself from drips
- Clean in small, controlled sections rather than covering a large area at once
Once the mold is removed, make sure the ceiling dries thoroughly. Good airflow is essential. Open a window, switch on the fan, or let the room air out naturally. A dry ceiling is far less likely to develop mold again.
Natural vs. Chemical Mold Removal
Before choosing a product to clean mold, it helps to understand the difference between natural and chemical solutions. Each has its own strengths, and the right choice often depends on how widespread the mold is, what surface you are cleaning, and how sensitive you are to strong odors or chemicals. Learning about both options will help you make a safe and effective decision.
Natural Mold Removal Solutions
Several natural ingredients can help clean bathroom mold without relying on strong chemicals. White vinegar is one of the most widely used options because it can break down surface-level mold when applied directly.
Hydrogen peroxide at a 3 percent concentration is another dependable choice and provides mild disinfecting benefits without being too harsh.
Baking soda mixed with a little water forms a gentle paste that works well on textured or uneven areas.
Some people also turn to tea tree oil, properly diluted, for its natural antifungal properties. These simple ingredients are easy to find and safe for most bathroom surfaces, making them a practical starting point for natural mold removal.
Chemical Mold Removal Solutions
A range of chemical cleaners is available for tackling mold, each designed to break down growth more aggressively. Many commercial mold and mildew removers include active ingredients formulated specifically for bathroom surfaces, giving them the power to cut through buildup that natural solutions may struggle with. Diluted bleach solutions are also widely used on hard, nonporous materials, and the EPA lists them among the recognized options for treating surface mold. These products are often fast-acting, which makes them helpful when you want to clear visible mold without multiple rounds of cleaning.
Other products, such as cleaners containing quaternary ammonium compounds, appear in certain household disinfectants and can target mold more directly. Commercial antifungal sprays made for bathrooms offer ready-to-use formulas for tiles, grout, and other moisture-prone areas. They vary in strength and scent, but all are designed to break down mold effectively.
Natural vs. Chemical Mold Cleaners: Which Works Better?
Natural cleaners offer a softer approach to mold removal. They are easy to work with, have lighter scents, and feel safer for everyday use. Ingredients like vinegar or hydrogen peroxide are simple to apply and do not require heavy protective gear. Their main drawback is that they usually act slowly, and you may need to repeat the cleaning a few times before the mold fully fades.
Chemical cleaners take a different path. They are designed to work quickly and break down mold more aggressively, which makes them helpful when the mold has settled into grout or textured areas. Because they are stronger, they require better ventilation and more caution, but they can deliver clearer results in a shorter time.
Both types can remove mold effectively, but they do so with different levels of strength and intensity. Natural solutions feel gentler and more comfortable for regular use, while chemical products are better for situations that need faster or deeper cleaning. Understanding how each one works makes it easier to choose the right approach when deciding how to remove mold from bathroom surfaces in a reliable and thorough way.
How to Prevent Mold from Growing Back?
Once you have cleaned the bathroom, the next step is keeping the mold from returning. The simplest way to do that is by controlling moisture and improving airflow. A few small habits can make a noticeable difference, and the points below highlight the easiest changes you can start using right away.
- Run the exhaust fan during and after showers to remove steam quickly and lower humidity.
- Fix small leaks right away, whether it is a dripping faucet or a loose pipe connection, so moisture does not collect behind surfaces.
- Keep the room ventilated by opening a window or leaving the door slightly open after bathing to help everything dry faster.
- Wipe down wet surfaces like shower walls, sinks, and counters to prevent lingering moisture and soap buildup.
- Use mold-resistant paint, caulk, or grout when updating the bathroom, since these materials are designed to discourage mold growth.
Using an Air Purifier for Mold can also help reduce airborne spores and keep the bathroom air cleaner, especially in homes that struggle with humidity.
Finally Put an End to Bathroom Mold With ActivePure
After dealing with moisture, scrubbing surfaces, fixing leaks, and trying to stop mold from coming back, it’s a relief to have a solution that works in the background for you. An Air Purifier for Mold powered by ActivePure Technology helps break the cycle by reducing airborne mold spores before they land anywhere in your home. It keeps the air cleaner, the bathroom fresher, and gives you the peace of mind that the mold you worked so hard to remove is far less likely to return.
Final Thoughts
How to remove mold from bathroom spaces becomes much more manageable when you understand what causes mold and how to keep moisture under control. Simple habits like using proper ventilation, drying wet areas, and fixing small leaks can greatly reduce the chances of mold returning after cleaning. Even with these steps, some mold spores remain in the air and can settle again, which is why many homeowners choose an Air Purifier for Mold to improve indoor air quality. Systems that use ActivePure provide continuous support by reducing airborne contaminants before they reach bathroom surfaces. When you combine regular maintenance with effective air purification, you create a cleaner environment that stays mold free for a longer time.
FAQs About Bathroom Mold Removal
How to remove mold from bathroom?
Start by wearing basic protective gear, then apply a gentle cleaner like vinegar or hydrogen peroxide and let it sit for a few minutes. Scrub in small sections, rinse well, and dry the area completely so moisture does not bring the mold back.
How often should I clean my bathroom to prevent mold?
Wipe down wet surfaces after every shower and do a simple weekly clean to keep moisture and residue from building up and giving mold a chance to grow.
What is the best way to lower humidity in the bathroom?
Run the exhaust fan during and after showers, or open a window and keep the door slightly open so the room dries faster. For extra support with moisture and airborne spores, using an AirPurifier For Mold can also help keep the bathroom environment more balanced.
Why does mold keep coming back even after cleaning?
It usually returns because moisture remains in the bathroom. Hidden leaks, poor ventilation, or airborne spores can also cause repeated growth.